Myofascial release after training… That sounds so cool—if you haven’t heard about it before. But if you have and tried it you know it is more painful than cool. Unless you are really good at it, and then it is cool again.
If you are serious about training or playing tennis, you are probably pushing your limits almost to the extreme. Which is fine, if you don’t push yourself, you don’t know how far you can go. However, training every day for hours, playing tennis on the concrete, the uneven nature of tennis, lifestyle imbalances in the body, and many other factors can make it really hard on your body.
The harder you train for strength, quickness and power, the more time you have to spend on the rehabilitating your body and recreating musculoskeletal balance. You need to listen to your body, to its subtle signs that signal to you that something is happening. A little tightness here, or a little tweak there… they all mean that there are bigger things going on and can cause you problems in the future.
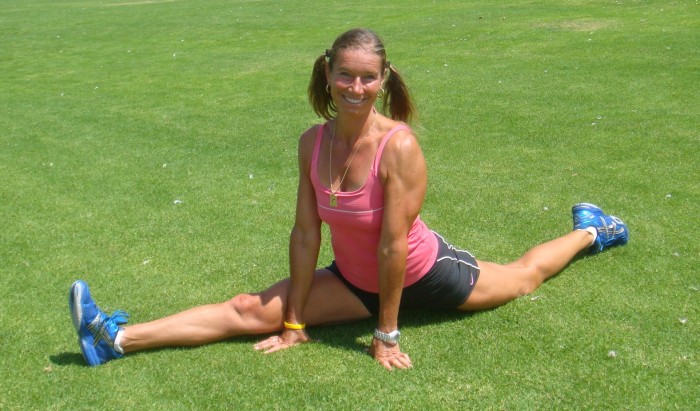
You need to learn to feel and be aware of your posture, balance, flexibility, and “evenness” of your both sides where the right and left side of your body should be equally strong and flexible.
The high-level tennis players, who do not need to groove their stroke technique as much anymore, work on their fitness 2–4 times longer than on their tennis. They spend a lot of time on rejuvenating their bodies with massage, physical therapy, cold therapy, myofascial release therapy, and many other cool techniques.
For a “normal” (aka non-proffesional or elite) athlete, it may not be feasible to spend this much time and money on rejuvenation every day. But he still needs to take equally good care of his body in the same way as the professional tennis player does.
Quite close to a good massage—only not so relaxing, because you need to be working actively rather than passively receiving the treatment—is self-myofascial release. You use tools such foam rollers or balls, plastic (firm) rollers, bumpy rollers, firm little balls and many other tools to lay on and roll on, creating pressure on your muscle tissues in a similar way like massage.
With a regular practice, you will learn how to be smooth in getting into the positions on the ball or roller, how much pressure you need to apply, and where are the spots that you need to address. The more you do it, the more pleasant the experience will be. In the beginning, I must warn you, it can be quite painful.
Always give attention to your entire body. However, if you find some specific areas that are more out of balance or more painful, spend extra time on those. The painful trigger points in your body will move around, and you need to pay attention and correct the small problems before they create more serious issues and injuries.
Myofascial release after training
The more intense your training is, the more frequently you need to perform the myofascial release routine. You can create your own routine depending on your needs, but the following routine is the one that I do regularly and that address all the spots that tennis players and hard training athletes may suffer with.
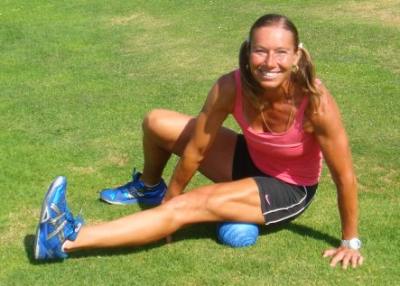
- Quadriceps. Start your routine with lying on your stomach and rolling your quadriceps. Observe if the right and left side feel different. Make sure to roll the front, inner and outer parts of the quadriceps. Make sure not to roll too fast or you won’t be able to find the sore little points. If you find one, stay on it for longer time, breathing deeply until the pain goes away. Then pull one leg to the side…
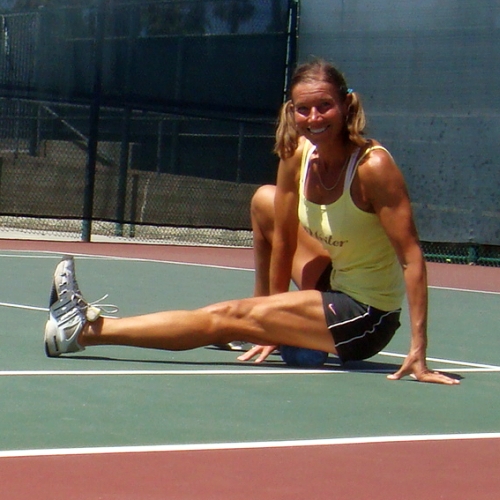
- Adductors. Place the ball on the inner thigh of the away leg. Roll the entire way from the knee toward your groin. Make sure to reach both front and backside of your adductors. When done, transition to the hip flexors, rolling your ball high up into the hip area…
- Hip flexors. Make sure to relax and let the ball sink deep into the hip area. This can be a little bit uncomfortable, weird feeling, because we are not used to have something dig deep inside our core area. Pay attention to make both sides even. Then roll over to the side…
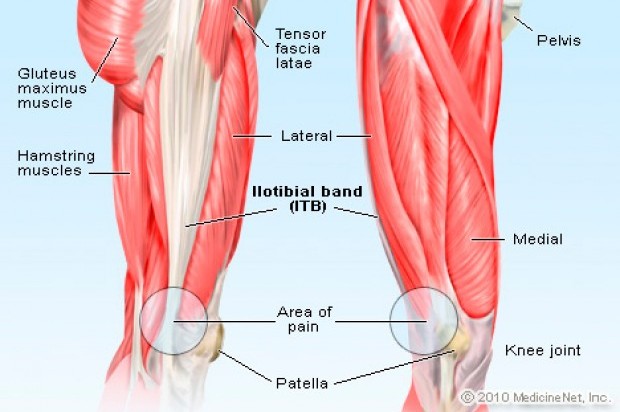
- IT Band, or illiotibial band. Spend a good amount of time on the entire length of the IT band (the tight band on the outside of your leg, between the hip and knee), addressing also the front and backside of the IT band. Then roll the ball high up on your hip…
- TFL, or tensor fasciae latae. TFL is above the IT band, on the outside of the hip. It is very thick and you need to work it deeply. Roll on the ball with both straight and bent leg. Pay attention if both sides feel the same. Then roll over on your back…
- Piriformis and gluteus (the booty). If you neglect it, you can experience nagging lower back problems or “sciatica” issues. Take your time to find all the trigger points. Then slide the ball under your hamstrings…
- Hamstrings. They are more difficult to roll, because it is hard to put full body weight on the ball, especially if you have limited flexibility. Try to get as much of your body weight on the ball as possible. Then move the ball to the bottom of your spine…
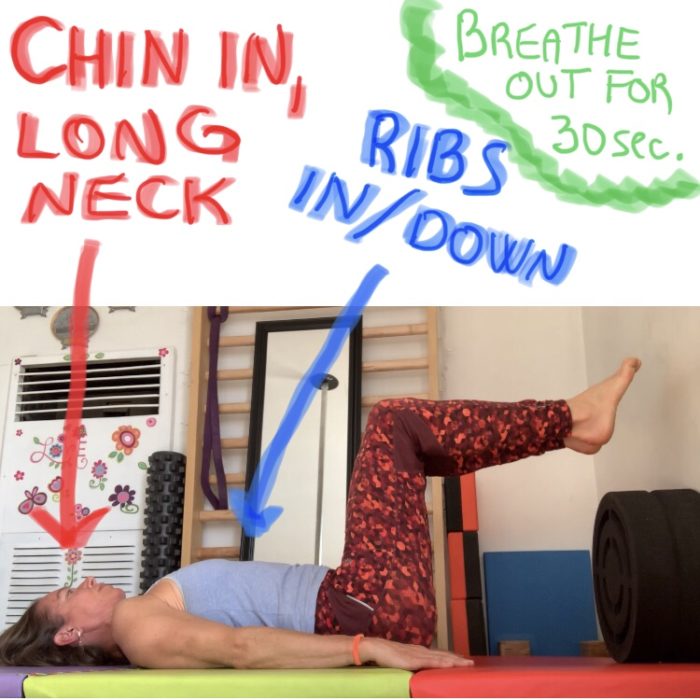
- Spine feels very good to roll on. Roll from the bottom up toward your neck and down again. Repeat a few times and feel how rejuvenated your spine will become. Move the ball to the upper back area…
- Upper back. Initially, rest on the ball and relax. Let your shoulders and arms sink. Then roll around the entire upper back area and look for tightness, especially in your dominant side. When done, roll over on your stomach with the ball under your chest…
- Chest. Roll the entire chest area from the sternum, around the clavicle, and outward to your arm. Continue on your biceps. Then get up on your knees with the ball under your lower leg…
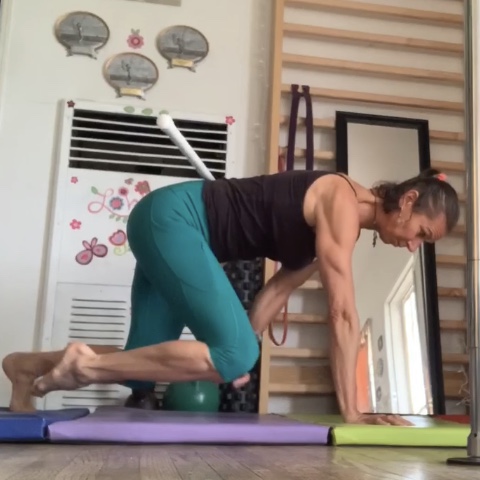
- Lower leg muscles. It feels very good to massage the outside part of the lower leg—an area seldom addressed. Roll from the ankle toward your knee and back. Then turn around to move on the calves…
- Calves. They are hard to roll on the ball, because they need deeper penetration. Start on the ball first, and then use your opposite knee to reach deeper.
The routine takes 20 to 40 minutes to finish, depending on how long you stay on different areas. Initially, it will be a painful experience that will become more pleasant as your muscles get healthier and more functional. Eventually, you reach the point that you enjoy doing myofascial release as much as you enjoy a good massage.
If you would like to have detailed instructions on every part of the routine, there is an e-booklet available.
Keep rolling and play injury-free tennis for the rest of your life.
.